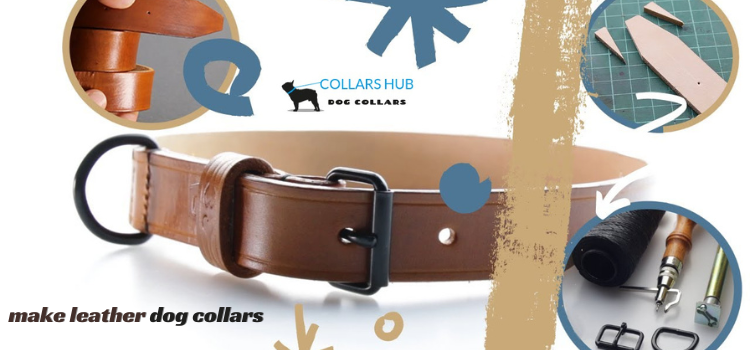
Dog collars are vital pet accessories. They act as a leash attachment and express your pet’s flair. Why not construct leather dog collars yourself for a unique and lasting option? We’ll show you how to make attractive and durable leather dog collars in this detailed tutorial. Bring your imagination and craftsmanship abilities to make leather dog collars fashionable.
Leather Selection
The first step in making leather dog collars is choosing the proper leather. Durability depends on leather quality. Leather comes in full-grain, top-grain, and genuine. Due to its robustness and natural beauty, full-grain leather dog collars are the best.
When choosing leather, consider thickness, texture, and color. Thick leather is stronger and better for bigger dogs than thinner leather. Leather comes in smooth, pebbled, or embossed textures. This hue should match your dog’s fur and your style.
Check the tan before buying leather. Pet-safe and ecologically friendly vegetable-tanned leather is popular. Check for surface flaws that might degrade leather.
Consider your dog’s comfort and safety while choosing leather for a collar. Rough leather can irritate the skin and create pain. Select soft, easy-to-work leather that is kind on your pet’s skin.
Measure and Cut
To make a leather dog collar, measure and cut the leather after choosing it. Start by carefully measuring your dog’s neck. Wrap a flexible tape measure securely around your dog’s neck to establish collar length. Make sure two fingers fit between the tape and your dog’s neck for comfort.
For overlap and buckle and hardware attachment, add a few inches to the measurement. Mark the leather strip’s measurements and use a sharp utility knife or rotary cutter to cut it precisely.
Before continuing, check collar breadth. For strength and stability, bigger dogs need a broader collar than smaller ones.
Adding the Buckle
The buckle is vital to your leather dog collar. It fastens securely and adjusts as your dog develops. Choose a sturdy buckle that will sustain daily use.
Fold one end of the leather strip over the buckle bar by an inch to attach it. Attach it with leather rivets or Chicago screws. Make sure the attachment holds together throughout usage.
The other end of the leather strip should slide through the buckle prong and overlap the first end. This loop lets you alter the collar’s size. Secure the second end with rivets or screws. Make sure the buckle is secure to avoid dog-walking mishaps.
The buckle should fit snugly but not too tightly or loosely. Your dog should be able to breathe and move comfortably in the collar.
Design Personalization
Adding customized graphics to leather dog collars is thrilling. You may be creative and make a collar that matches your pet’s style.
You may customize your leather dog collar:
1. Leather Stamps: Leather stamps are great for customizing collars. Stamps range from geometric to flowery. Stamp the leather pattern carefully with a mallet.
2. Embossing: Leather embossing creates raised patterns. Add texture and dimension to your collar with embossing tools and a mallet. Paw prints, bones, and dog names are popular embossing designs.
3. Leather paint provides complete creativity. You may paint your dog’s name, favorite colors, or any pattern on leather. Use leather-friendly paint and let it dry before using the collar.
4. Hardware and Accessories: To make your collar stand out, add metal studs, rhinestones, or other decorations in addition to patterns and colors.
5. Stitching: Leather stitching gives collars a rustic look. You may hand-stitch motifs or your dog’s name on the collar with waxed thread.
To prevent choking or damage to your dog, tie any decorations or embellishments to the collar.
Stamping “Make Leather Dog Collars
Stamping “make leather dog collars” on the collar emphasizes the necessity of making your own. This adds style and encourages pet accessory-making.
Spell out the words using individual letter stamps to align and space them. It’s a subtle way to convey your satisfaction in your making talents to people who see your dog wearing the collar. Choose to stamp the text inside or outside the collar.
Stamping the message reminds you of the love and attention you put into making a unique and sturdy collar for your pet. It’s a badge of distinction for DIY leather dog collar makers.
Comfort Adjustment
After customizing your leather dog collar, make sure it’s comfy. Look for sharp edges or rough places on the collar. Even minor imperfections can irritate the skin.
Sand rough spots with sandpaper or a leather smoothing tool. The inside of the collar will touch your dog’s neck, so pay attention to it. Touch the collar to make sure it’s comfy.
Before your dog wears the collar, try it on your wrist for comfort. Remember that dogs have delicate skin, therefore a good fit is essential.
Applying Leather Conditioner
Leather conditioners strengthen and preserve leather dog collars. Leather conditioner keeps leather soft and avoids cracking and drying. Due to weather and use, dog collars need regular conditioning.
Select a premium pet-specific leather conditioner.
Coat the collar inside and out with conditioner. Work the conditioner into the leather with a clean, soft cloth or sponge.
For many hours or as directed by the product, let the leather absorb the conditioner. Use a clean towel to remove excess conditioner. Regular conditioning can keep your leather dog collar looking great for years.
Final Fit
The ultimate fit comes after you’ve made, customized, and finished your leather dog collar. Buckle the collar around your dog’s neck. Adjust the collar for a tight, comfortable fit.
A good collar should fit two fingers between it and your dog’s neck. It’s not too tight, which may hurt your pet, or too loose, which could cause your dog to slide out of the collar.
Your dog may be growing, so check the collar’s fit often, especially for pups. Maintain a comfortable fit as your dog grows.
Maintaining Your Leather Dog Collar
To prolong a beautiful and lasting leather dog collar, you must know how to care for it. Leather is durable yet susceptible to weather and misuse. Tips for maintaining a leather dog collar:
1. Cleaning: For debris, dust, and surface stains, clean the collar with a moist cloth regularly. Avoid damaging leather with strong chemicals or solvents.
2. Drying: Allow your collar to air-dry if damp. Avoid hairdryers and radiators since they dry and harm leather.
3. Storage: Keep the collar cool, dry, and out of direct sunlight while not in use. Avoid folding or bending the collar to avoid wrinkles and leather weakness.
4. Reconditioning: Apply leather conditioner to keep the collar soft. The collar’s use and weather affect how often you do this.
5. Inspect Regularly: Check the collar for damage. Check for leather cracks, loose stitching, and broken hardware. Fix errors immediately to avoid additional damage.
These care suggestions can keep your leather dog collar looking great for years.
Conclusion
You may make elegant and durable leather dog collars for your pet by DIYing them. Following these instructions and using high-quality leather will give you a collar that stands out and keeps your pet safe on walks. So why delay? Make leather dog collars to show your love and creativity while giving your dog a stylish accessory. Your leather dog collar, handmade with love and tailored with flair, will symbolize your relationship with your pet. Encourage others to make pet accessories by sharing your talent. Celebrating your pet’s individual style and strengthening your bond is great.
Make leather dog collars FAQs
1. What’s the greatest dog collar material?
Leather dog collars are frequently the best because of their longevity, comfort, and adaptability. Durable and aging-friendly full-grain leather is popular. Also, try top-grain or suede leather for a distinct style.
2. How do I manufacture a dog collar?
Make a dog collar with these steps:
a. Measure your dog’s neck to size.
b. Select and cut the leather to length.
c. Punch buckle and D-ring holes.
D. Attach hardware with rivets or Chicago screws.
e. Stitch the collar edges for durability and style.
Add any desired decorations to the collar.
g. Seal and beautify leather with conditioner.
3. Designer dog collars: how?
For designer dog collars, incorporate distinctive aspects like:
Decorative leather stitching or tooling.
– Rhinestones, gems, or studs for bling.
Personalized dog name or message engravings.
– Exotic leathers for luxury.
4. Is making dog collars easy?
Simple dog collars are easy to make if you know leatherworking or sewing. The design and materials you use affect complexity. More complicated designs need time and skill.
5. Dog collar materials?
Material options for dog collars include leather, a classic and durable alternative.
Nylon or polyester collars are lightweight and washable.
Chain for training or specialties.
6. What dog collar hardware do I need?
Standard hardware for dog collars comprises buckles for fastening.
– Leash D-rings.
Secure connections using rivets or Chicago screws.
– Studs or jewels optional.
7. How do you build a collar step-by-step?
A more extensive step-by-step guide:
– Measure your dog’s neck well.
– Cut a leather strip to length and breadth.
Punch holes for hardware and decorations.
Attach the buckle and D-ring to opposite ends.
Strengthen the collar edges with stitching.
Add ornaments to your collar.
Finish the collar with leather conditioner for gloss and protection.
8. Do designers manufacture dog collars?
Artists and designers make personalized dog collars. To make beautiful pet collars, they provide a variety of materials, designs, and customizable possibilities. Collars may be stylish and utilitarian.
Consider your dog’s comfort and safety while creating collars. Make sure the collar fits well and check for pain or wear.